
I’ve been using a Rush based monorepo for around 3 years now. The codebase consists of a high volume marketplace website, some B2B APIs and a few CLI apps; somewhere around 20 or so individual projects accessed by two dev teams. We have had the felt the general benefits of using a monorepo such as:
- Simple initial code checkout, limited to one repository clone
- Easy dependency management, dependencies can be kept in sync at the repository level across all projects
- Easy refactoring, IDEs can search across all projects for changes
- Simplified testing and deployment, all projects can be tested and deployed as a unit when changes are made
Using Rush as the monorepo manager and PNPM as the package manager gave us a valuable productivity boost on top of these such as:
- Super fast builds, due to Rush’s parallel and incremental builds
- Big repository size reduction, due to PNPMs efficient module dependency management
- Consistent dependency versions across projects, using Rush’s check command before commits
- Easy package build management, using Rush’s deploy command
- Simplified local execution, using Rush’s custom global commands
While there has been little need for major changes since the initial configuration, I recently setup a new repository and found some nicer ways of configuring rush that I thought I’d share. You can find a example demo monorepo in this github repository.
Initialise a Rush monorepo
In order to initialise the monorepo we need two tools installed, Rush and a Node.js package manager. You can use the default NPM package manager, but since this article is about the benefits of using PNPM we will use PNPM, you can read about the trade-off of using NPM vs PNPM vs Yarn with Rush in the Rush documentation.
Follow the installation instructions in the PNPM documentation for your platform, I am using Linux and ran:
| |
Once PNPM is installed we can install Rush globally with:
| |
Then create the directory you will be working in and initialise the repository as a Rush and git repository using the following commands:
| |
The initialised repository will have a “common” directory where Rush will store it’s configuration and a “rush.js” file that is the main configuration file for rush, see the screenshot below for reference:

Setup rush repository defaults
Before adding projects to the repository I like to configure some global options to help the teams using the repository have a consistent experience.
Define the tool versions
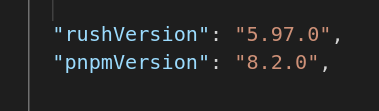
In the “rush.js” config file set the rushVersion and pnpmVersion properties to the latest versions you want to use, this will ensure that when a user pulls the repo for the first time that the same version or Rush and PNPM will be configured for each user. It is also worthwhile setting the nodeSupportedVersionRange property to specify a narrow range of node versions that a developer should be using to avid surprises if you are using newer Node.js features. I used the following to get the versions I had installed. There are a few other settings that are worth configuring but I’ll leave those to future posts in this series.
| |
Standardise commit messages
When you have many people working on a repository, limiting the format of git commit messages can help ensure everyone can understand the changes that are occurring in the repository over time. Conventional Commits provides a light weight “convention” for commit messages that you can use, it’s just a specification, to actually check the commit messages we can use a git-hook that fires on commit and the commitlint node package. We can also get some guidance on how to structure our commit messages using the prepare-commit git hook, this runs when you type git commit, using commitizen, commitizen will give you an interactive cli to create your git commit message. For those using visual tools there are plugins like this one for VS Code that provide the same message guidance.
Rush provides a structured mechanism to create git hooks and to install monorepo wide tooling, the rush term is an auto-installer. Create one using the command below:
| |
This will create a folder in common/autoinstallers/conventional-commits with a package.json you can configure. Change directory into this folder and use PNPM to install the following packages:
| |
You need to add a configuration file for commitlint in the autoinstaller directory called commitlint.config.js containing the following and any additional config you choose:
| |
We also need to tell commitizen which standards it must follow, place a file named .czrc in the root of the project, same level as rush,json, with the following contents:
| |
We now have the required packages installed, we just need to tell Rush that we are done changing the auto-installer package.json file by running the following, run it each time you make changes to the autoinstaller:
| |
Now we can configure our git hooks. I found for the next steps to work I had to have made one initial commit, so start by running:
| |
Now lets start with the commit-msg hook that runs after you try commit, we can use the git hook to check if the provided message meets our standards. Add a file called “commit-msg” in the common/git-hooks folder with the following content:
| |
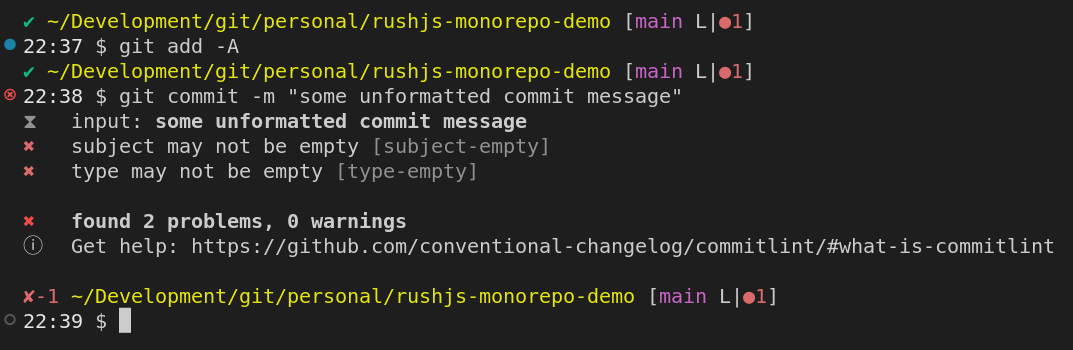
If you now run rush install Rush will install the git hooks for you, re-run it each time you make a change to a hook. You can see what rush installed by looking in your hidden .git/hooks folder in the project root. Now when you try commit with a message that doesn’t follow the convention then the git command will fail, for example:
| |
will result in the following failure:
We have successfully limited commit messages to follow the convention but it’s not yet that user friendly, next we will add commitizen support to prompt us for commit messages in the correct format. This time we will use the prepare-commit git hook. Add a file called “prepare-commit-msg” in the common/git-hooks folder with the following content:
| |
Now run rush install again, Rush will install the updated git hooks for you.
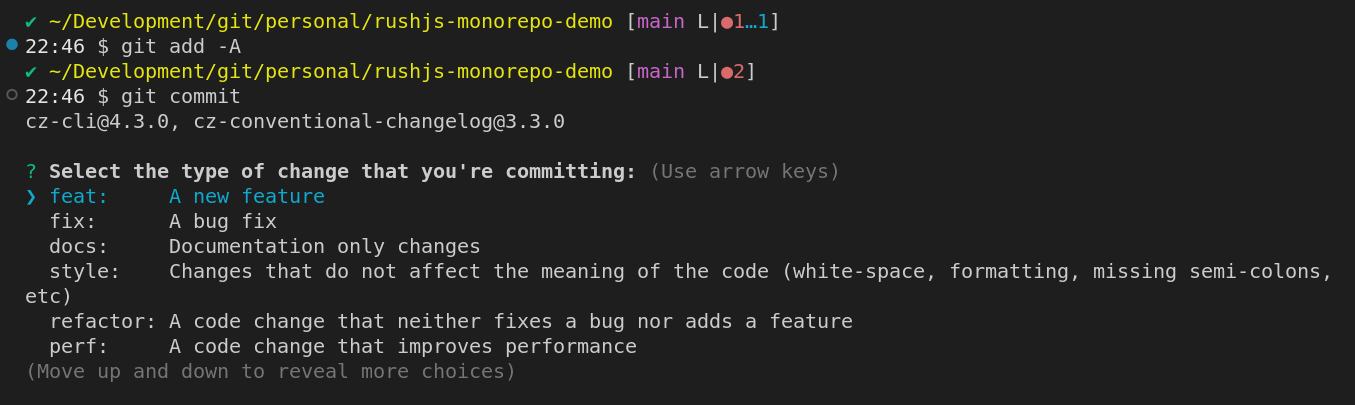
You can now try commit these changes by trying to commit and follow the commitizen prompts:
| |
This time you get a nice interactive prompt to help you create the correctly formatted commit message.
Enforce common dependency versions
Forcing developers to consider the impact of their changes on the rest of the repository, in terms of new or updated package dependencies, before they commit code can be very useful. Rush has a rush check command that can tell you if package versions are inconsistent across projects. There are valid scenarios when you need to have different versions, and rush supports this need with the allowedAlternativeVersions section in the common-versions.json file but in many projects I’ve worked on this feature has been handy.
This can be enforced with a pre-commit hook, add a file called “pre-commmit” in the common/git-hooks folder with the following content:
| |
Now run rush install again, Rush will install the updated git hooks for you. Each time you commit rush will let you know if any dependencies are out of date. If your team finds this too invasive there is a newer setting that can be enabled in the rush.json config file ensureConsistentVersions that will run rush check when running any of the following rush commands:
- rush install
- rush update
- rush link
- rush version
- rush publish
Enforce consistent syntax style
Lastly we can configure prettier to format all code in the repository in a consistent manner, we can use the rush autoinstaller and git hooks once again, but as the process is a little more complex I will leave the explanation to another post in this series once we have some code to format.
Next steps
In the next article I’ll discuss how to add projects to rush using conventions and how to configure rush to build them.